Quick Actions
The Event Dashboard provides several quick actions that let you create events, share links, and navigate efficiently without leaving the dashboard. This page covers every action available to you.
Creating a New Event
To create a new event from the dashboard:
- Select the Create Event button in the top-right corner of the dashboard. The button displays a plus icon alongside the label.
- You will be taken to the event type selection page where you can choose between Ticketed, RSVP, Sign-up, or Open event types.
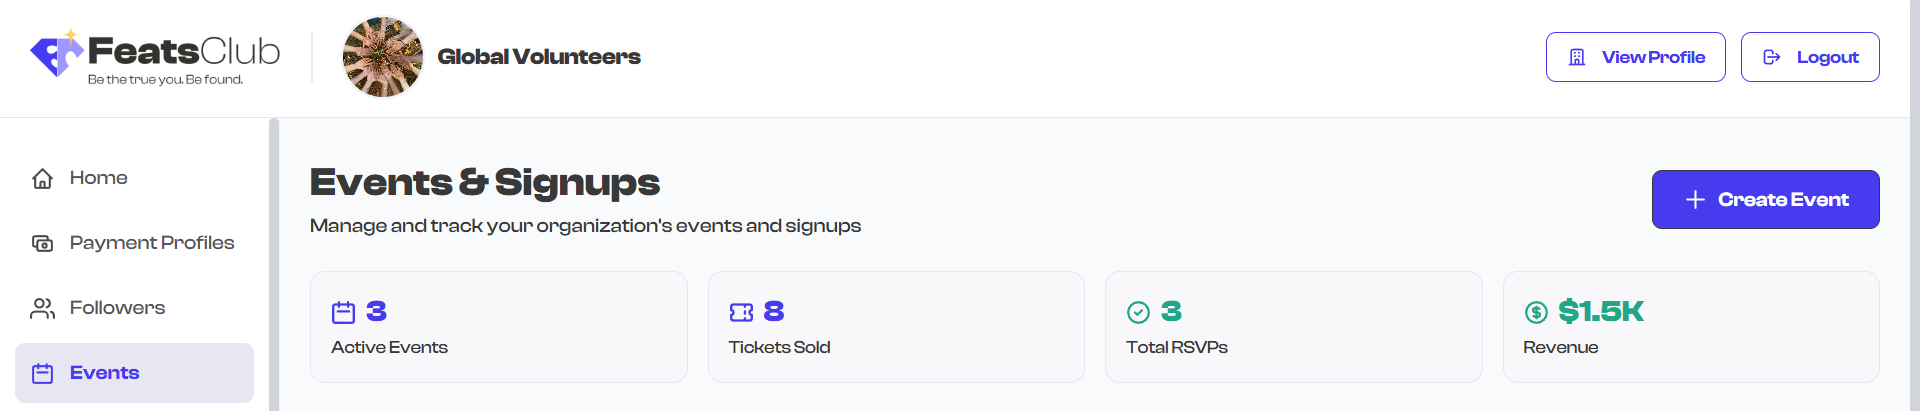
If your organization has no events yet, you can also select the Create Your First Event button displayed in the empty state welcome screen on the Active tab.
The Create Event button is only visible if you have the appropriate permissions in your organization. If you do not see this button, contact your organization admin to request event creation access.
Viewing Event Details
To open an event's detail page:
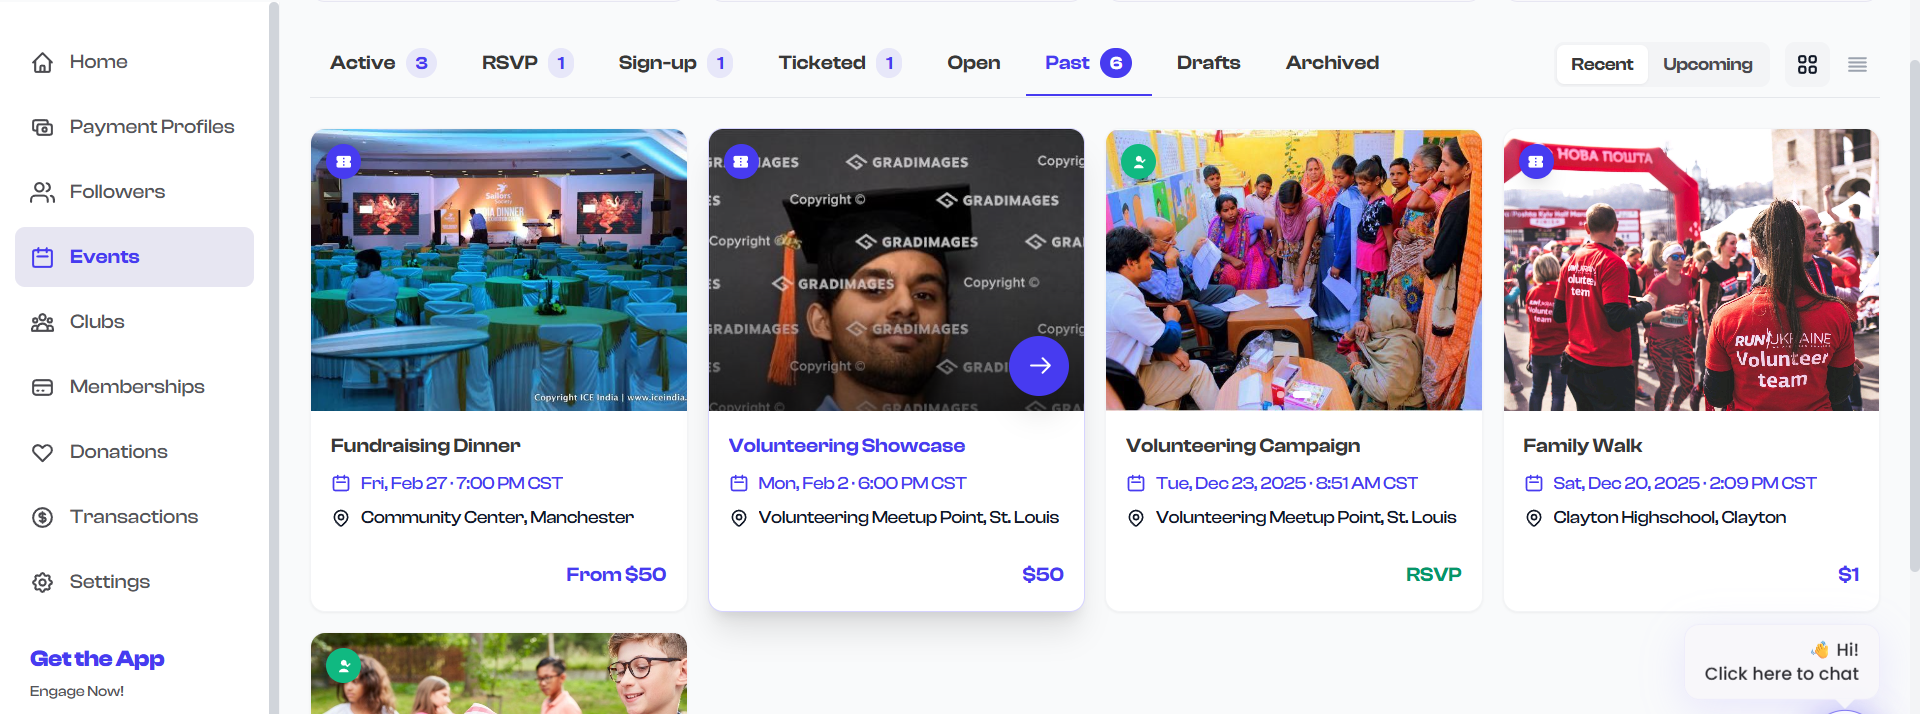
- In grid view: Select anywhere on an event card. The card is fully clickable.
- In list view: Select anywhere on an event row. The entire row is clickable.
You can also use the dedicated view button (the purple circle with an arrow icon) that appears when hovering over a grid card.
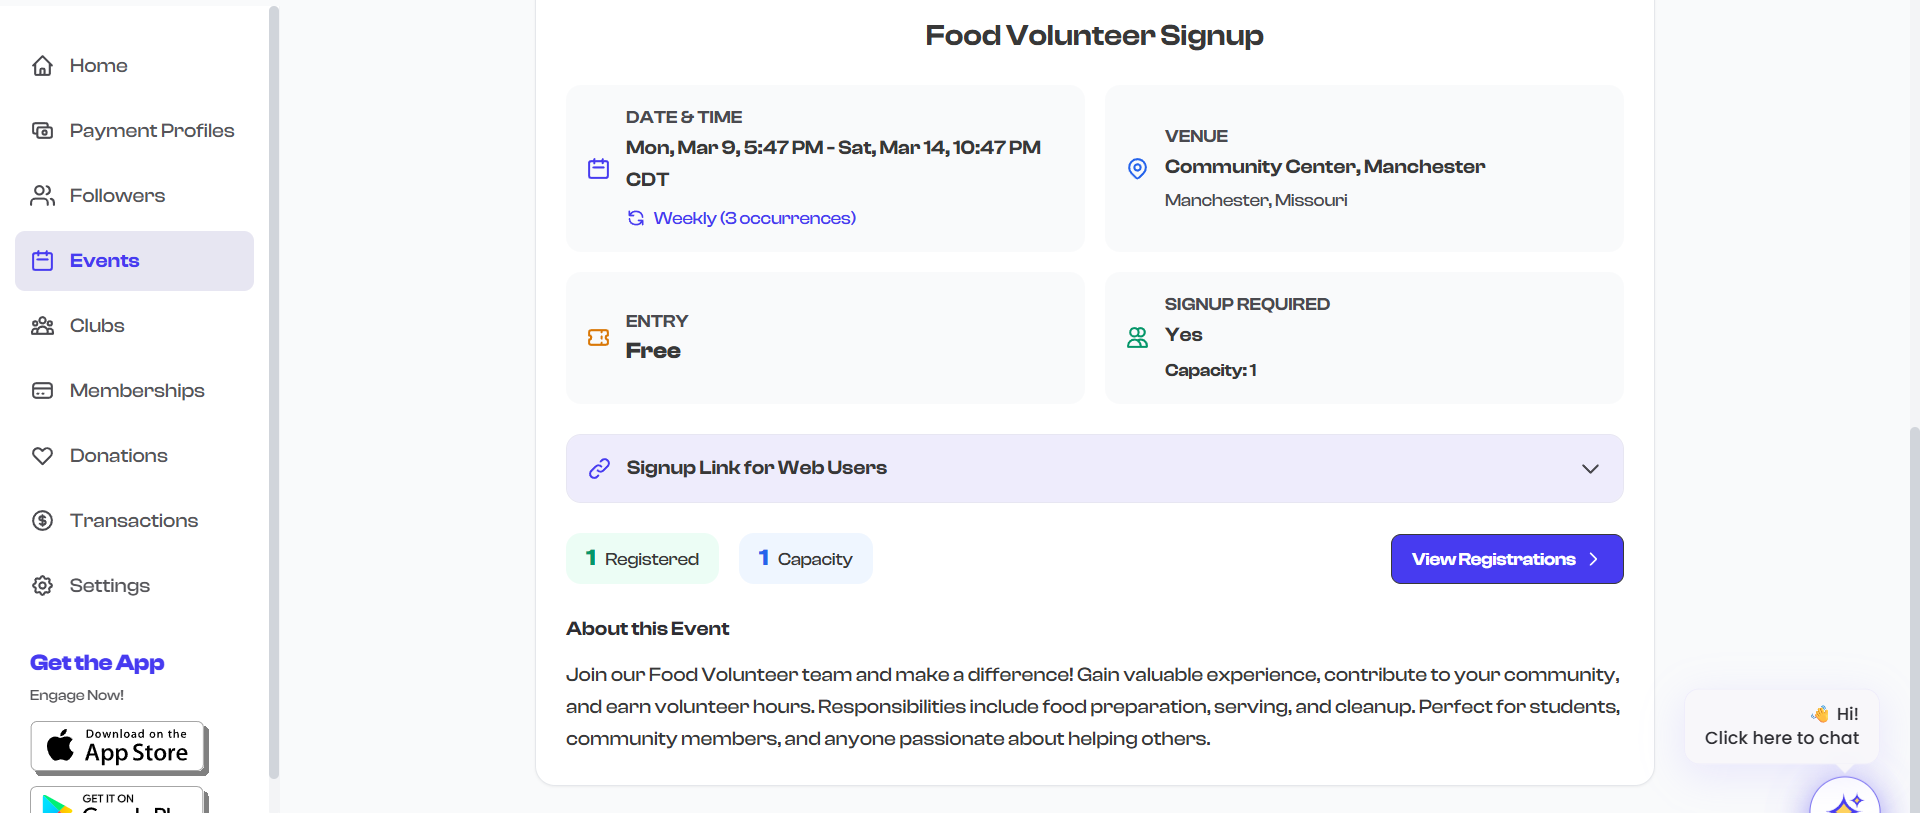
Selecting an event takes you to the event detail page where you can view all event information, manage tickets, track RSVPs, and edit the event.
Sharing an Event Link
You can copy a shareable link for any event directly from the dashboard without opening the event first.
In Grid View
- Hover over the event card you want to share.
- Two action buttons appear at the bottom-right of the card image.
- Select the white share button (the circular button with a share icon).
- The event's link is copied to your clipboard.
- A checkmark icon briefly replaces the share icon to confirm the copy was successful.
In List View
- Hover over the event row you want to share.
- A share button appears on the right side of the row.
- Select it to copy the event link to your clipboard.
- A checkmark icon confirms the link was copied.
After copying, you can paste the link into an email, message, social media post, or anywhere else you want to share it.
The share button provides the fastest way to distribute event links. Instead of opening each event to find its link, you can copy multiple event links in quick succession directly from the dashboard.
Filtering Events
Selecting any of the eight filter tabs immediately updates the event listing. This is a quick action that does not require a page reload -- the events are filtered instantly on screen.
- Select Active to see all live events across all types.
- Select RSVP, Sign-up, Ticketed, or Open to narrow down by event type.
- Select Past, Drafts, or Archived to view events by status.
See Filtering Events for detailed information about each filter tab.
Switching View Mode
Toggle between grid and list layout using the view mode icons next to the filter tabs.
- Select the grid icon (four squares) for a visual card layout.
- Select the list icon (horizontal lines) for a compact row layout.
See Grid and List View for a full comparison of both views.
Summary of All Quick Actions
| Action | How to Do It | Where |
|---|---|---|
| Create a new event | Select Create Event button | Top-right of header |
| Open event details | Select any event card or row | Event listing area |
| Copy event share link | Hover over card/row, select the share button | Event card hover state |
| Filter by event type | Select a filter tab (RSVP, Sign-up, etc.) | Tab bar below stats |
| Filter by event status | Select a status tab (Past, Drafts, Archived) | Tab bar below stats |
| Switch to grid view | Select the grid icon | Right side of tab bar |
| Switch to list view | Select the list icon | Right side of tab bar |
| Create first event (new org) | Select Create Your First Event | Empty state welcome screen |
Keyboard users can navigate the dashboard using Tab to move between interactive elements and Enter to activate buttons and links.