How Members Sign Up
This guide walks you through the enrollment experience from your member's perspective. Understanding how sign-up works helps you set up your memberships for the smoothest possible experience.
The Enrollment Flow
When someone decides to join one of your memberships, they go through the following steps:
1. Discover Your Membership
Members can find your membership in three ways:
- Organization profile -- Your active memberships are displayed on your public organization page. Visitors can browse your offerings and select one to learn more.
- Direct link -- You share a link that takes them straight to your membership listing.
- QR code scan -- They scan a QR code (from a flyer, poster, or event booth) that opens your membership page on their phone.
2. View Membership Details
Before enrolling, the member sees a summary of what the membership includes:
- Name and description -- What the membership is and who it is for
- Benefits -- A list of what members receive (e.g., unlimited classes, priority registration, member discounts)
- Pricing -- The membership fee, including the billing interval for recurring plans (e.g., $99/mo, $499/yr)
- Term information -- Whether it is a fixed-date term, rolling enrollment, or lifetime membership
- Terms and conditions -- Any rules or policies the member should know about
- Cover images -- Photos or promotional media you have uploaded
3. Start Enrollment
The member taps Join or Enroll to begin the sign-up process.
4. Account Creation or Sign-In
If the member is not already logged in to FeatsClub, they are prompted to either:
- Create a new account using their email, phone number, or a social sign-in option
- Sign in to their existing FeatsClub account
After signing in, they are returned to the enrollment flow automatically.
5. Fill Out Registration Form (If Configured)
If you have added a registration form to your membership, the member completes it at this step. Registration forms let you collect additional information such as:
- Emergency contact details
- Medical information or allergies
- T-shirt size or equipment preferences
- Agreement to waivers or codes of conduct
For group or family memberships (where the membership covers more than one person), the member also fills out a participant form for each additional person included in the plan.
You can configure whether the registration form appears before or after payment. Most organizations show the form before payment so all information is collected upfront. See Registration & Participant Forms for setup details.
6. Complete Payment
For paid memberships, the member is taken to a secure payment screen:
- Stripe is used for USD and international payments
- Cashfree is used for INR (Indian Rupee) payments
The member enters their payment details and confirms the transaction. The total amount displayed includes the membership fee and any processing fees (depending on your fee passthrough settings).
For free memberships, this step is skipped entirely and enrollment is confirmed immediately.
7. Receive Confirmation
After successful payment (or immediate enrollment for free plans), the member sees a confirmation screen. They also receive a confirmation notification in their FeatsClub account.
8. View Active Membership
The member can view their active membership at any time from their FeatsClub profile. Their membership details include:
- Membership name and organization
- Validity dates (start and end, or "Lifetime" for non-expiring plans)
- Member ID (e.g., GLD00001)
- Payment receipt information
- Any participant details for group memberships

Sharing Your Membership Link
Every membership has a shareable link that you can distribute to potential members. To get the link:
- Go to Dashboard > Memberships
- Select the membership you want to share
- On the membership detail page, find the Membership Link for Web Users section
- Copy the link URL using the copy button
You can paste this link anywhere -- in emails, text messages, social media posts, your website, or marketing materials.
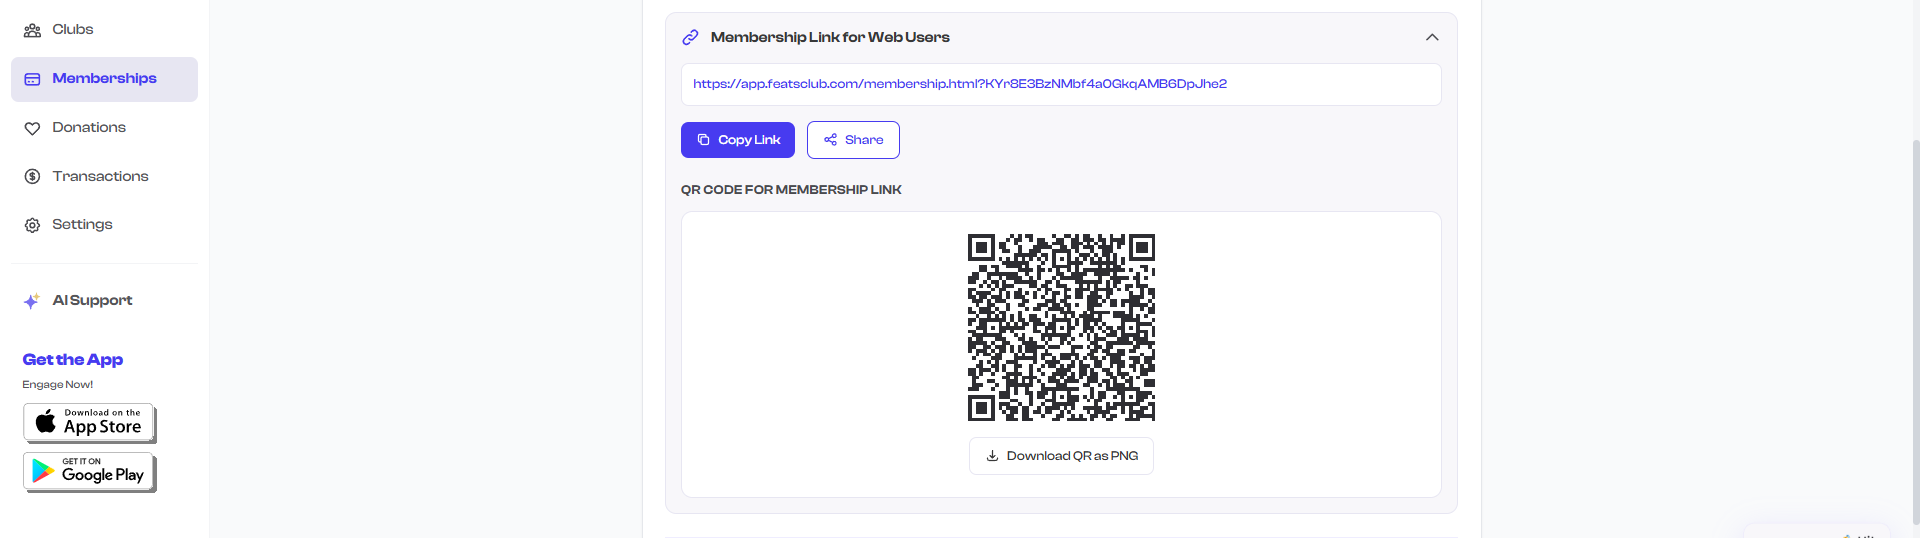
The shareable link works for all your organization's memberships, not just one specific plan. When a potential member opens the link, they can see all your active membership offerings and choose the one that fits them best.
QR Code for In-Person Sign-Ups
The FeatsClub mobile app generates a QR code for your membership link. This is perfect for:
- Posting at your reception desk or front door
- Printing on event flyers and posters
- Displaying on a screen at registration tables
- Including in physical mailings or brochures
When someone scans the QR code with their phone camera, it opens your membership page in their browser where they can enroll immediately.
Tips for a Smooth Enrollment Experience
Members are more likely to enroll when they quickly understand what the membership offers and what it costs. Lead with the most compelling benefits.
Before sharing your membership link publicly, open it in an incognito browser window and walk through the enrollment process as if you were a new member. This helps you catch any confusing steps or missing information.
If your organization serves families, set up a membership with multiple participant slots (e.g., "Family Plan -- up to 4 members"). This lets one person pay for the whole group and fill out participant details for each family member during enrollment.
What's Next?
Learn about Payment Processing to understand how FeatsClub handles payments during enrollment, including fees, supported currencies, and offline payment options.