Ticket Sales
For ticketed events, FeatsClub provides a dedicated view to track all ticket purchases, monitor revenue, and review buyer details. This page explains how to navigate and use the ticket sales view.
Accessing Ticket Sales
- Navigate to the Event Dashboard and select a ticketed event.
- On the event detail page, select the View Ticket Sales button in the ticket section.
- The ticket sales view opens, displaying all purchases for this event.
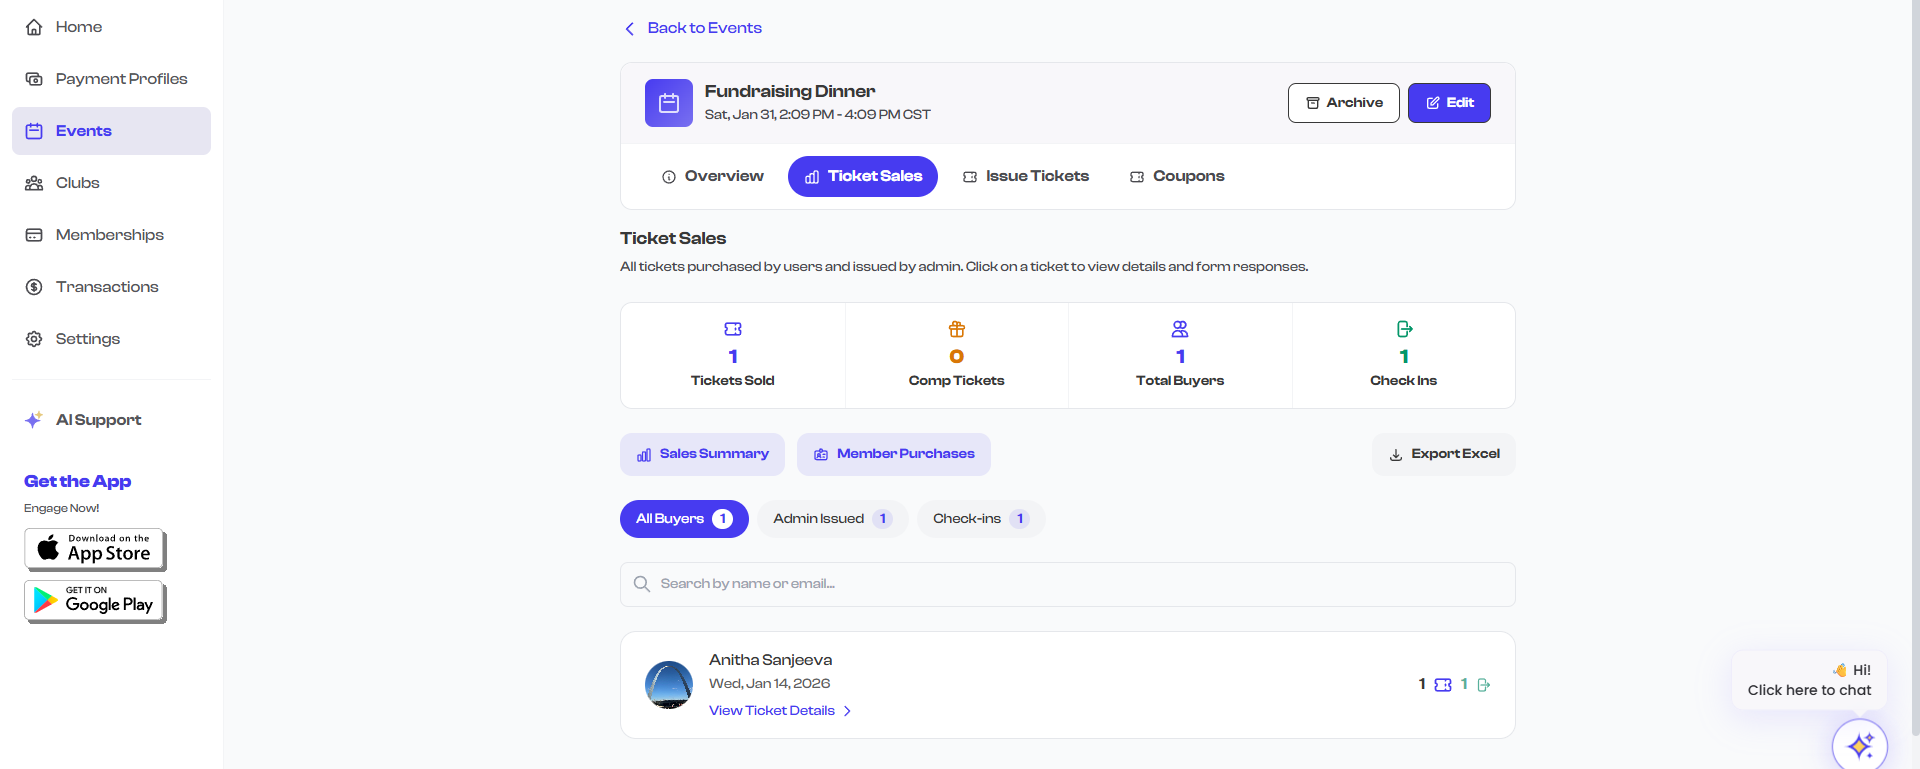
Sales Overview
At the top of the ticket sales view, you will see summary statistics for the event:
| Metric | Description |
|---|---|
| Tickets Sold | The total number of tickets purchased across all ticket types |
| Revenue | The total revenue collected from ticket sales, displayed in the event's currency |
These numbers update in real time as new tickets are sold or canceled.
Viewing Purchases
The main area of the ticket sales view lists all ticket purchases. Each entry shows:
| Column | Details |
|---|---|
| Buyer name | The name of the person who purchased the ticket |
| The buyer's email address | |
| Ticket type | Which ticket type was purchased |
| Purchase date | When the ticket was bought |
| Amount | The amount paid for the ticket |
| Status | Whether the ticket is active or has been canceled |
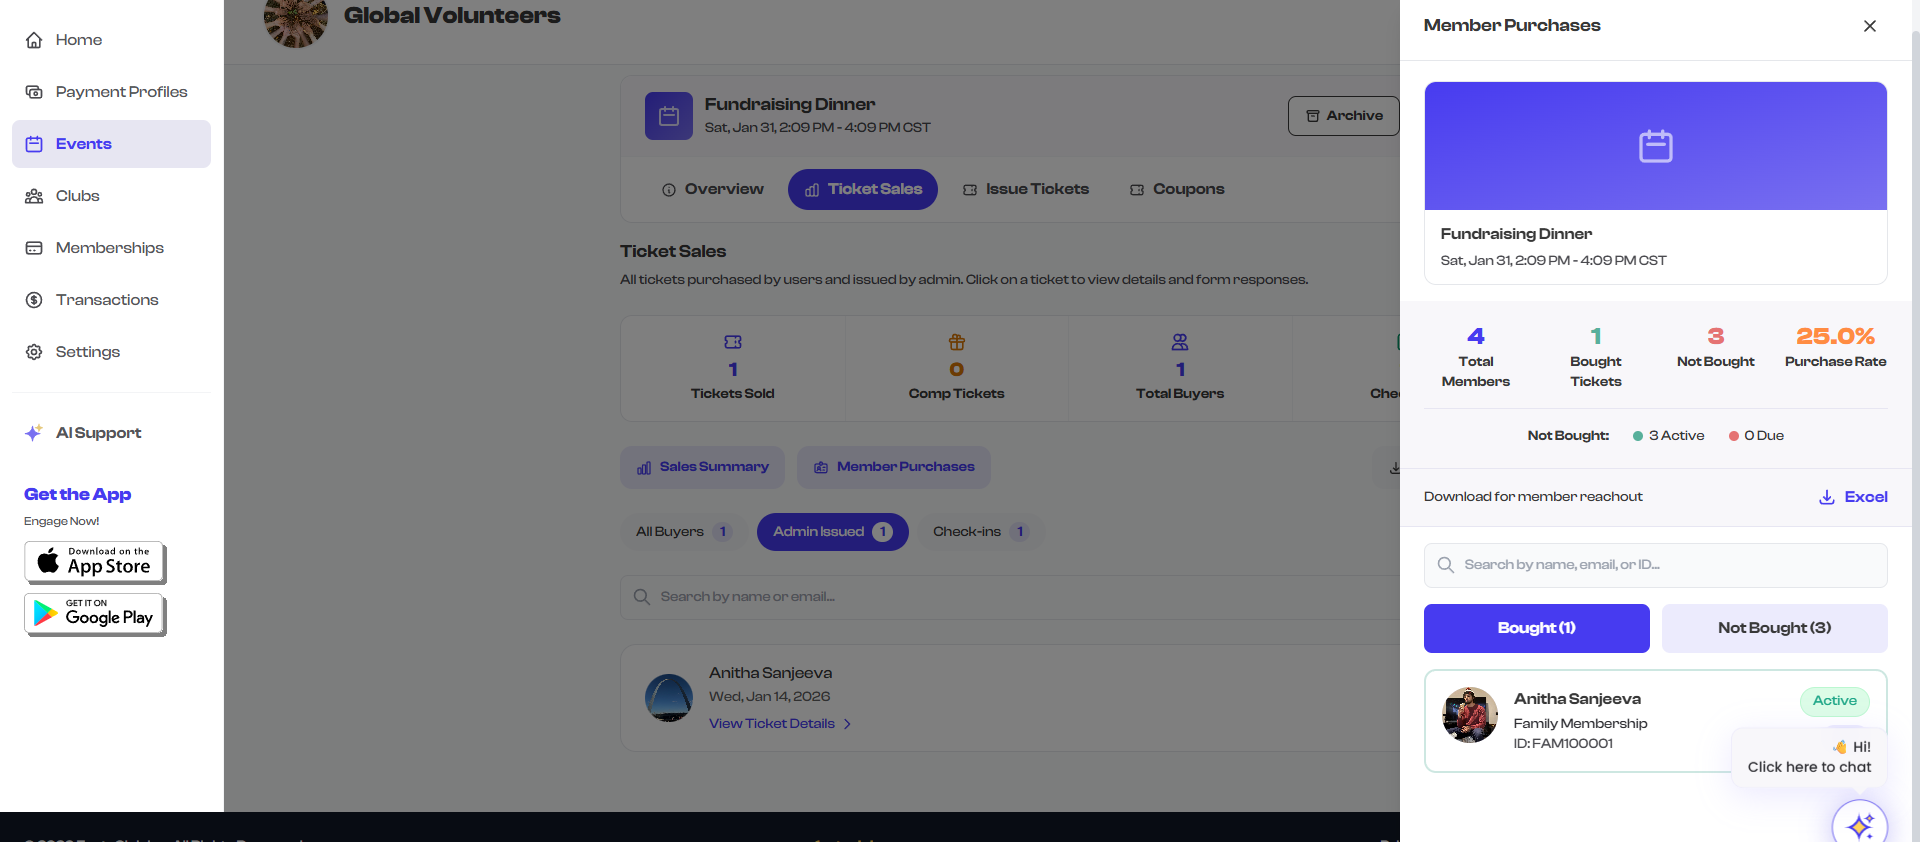
Filtering by Ticket Type
If your event has multiple ticket types, you can filter the purchase list to see only a specific type:
- Look for the ticket type filter at the top of the purchase list.
- Select a specific ticket type to narrow the list.
- The summary statistics update to reflect only the selected ticket type.
- Select All to return to the full list.

Ticket Detail Side Panel
To view more details about a specific ticket purchase:
- Select any row in the purchase list.
- A side panel opens showing the full ticket details.
- The panel includes all buyer information, ticket specifics, payment details, and the ticket's current status.
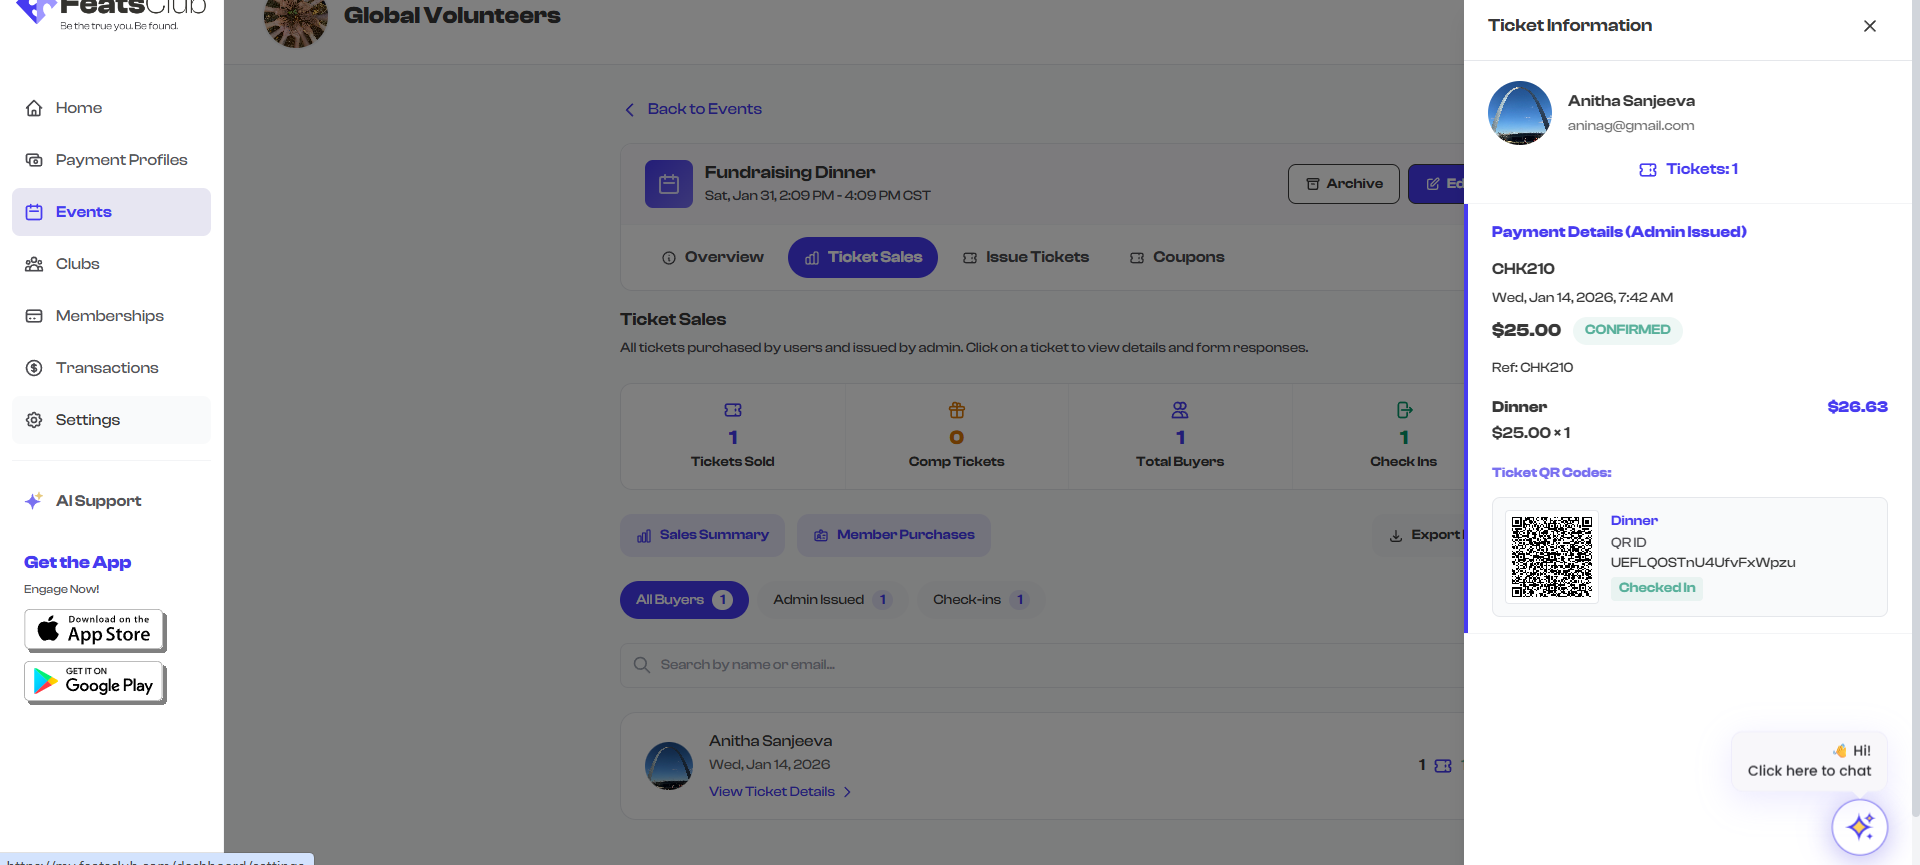
Information in the Side Panel
The side panel provides comprehensive details about each purchase:
- Buyer profile -- Name, email, and contact information.
- Ticket type and quantity -- Which ticket was purchased and how many.
- Payment details -- Amount paid, payment method, and transaction reference.
- Purchase timestamp -- The exact date and time of the purchase.
- Ticket status -- Active or Canceled, with the cancellation date if applicable.
- QR code -- The unique QR code assigned to the ticket for check-in purposes.
Ticket Statuses
Each ticket has a status that indicates its current state:
| Status | Badge Color | Meaning |
|---|---|---|
| Active | Green | The ticket is valid and can be used for check-in |
| Canceled | Red | The ticket has been canceled and is no longer valid |
See Cancellation for information on canceling individual tickets.
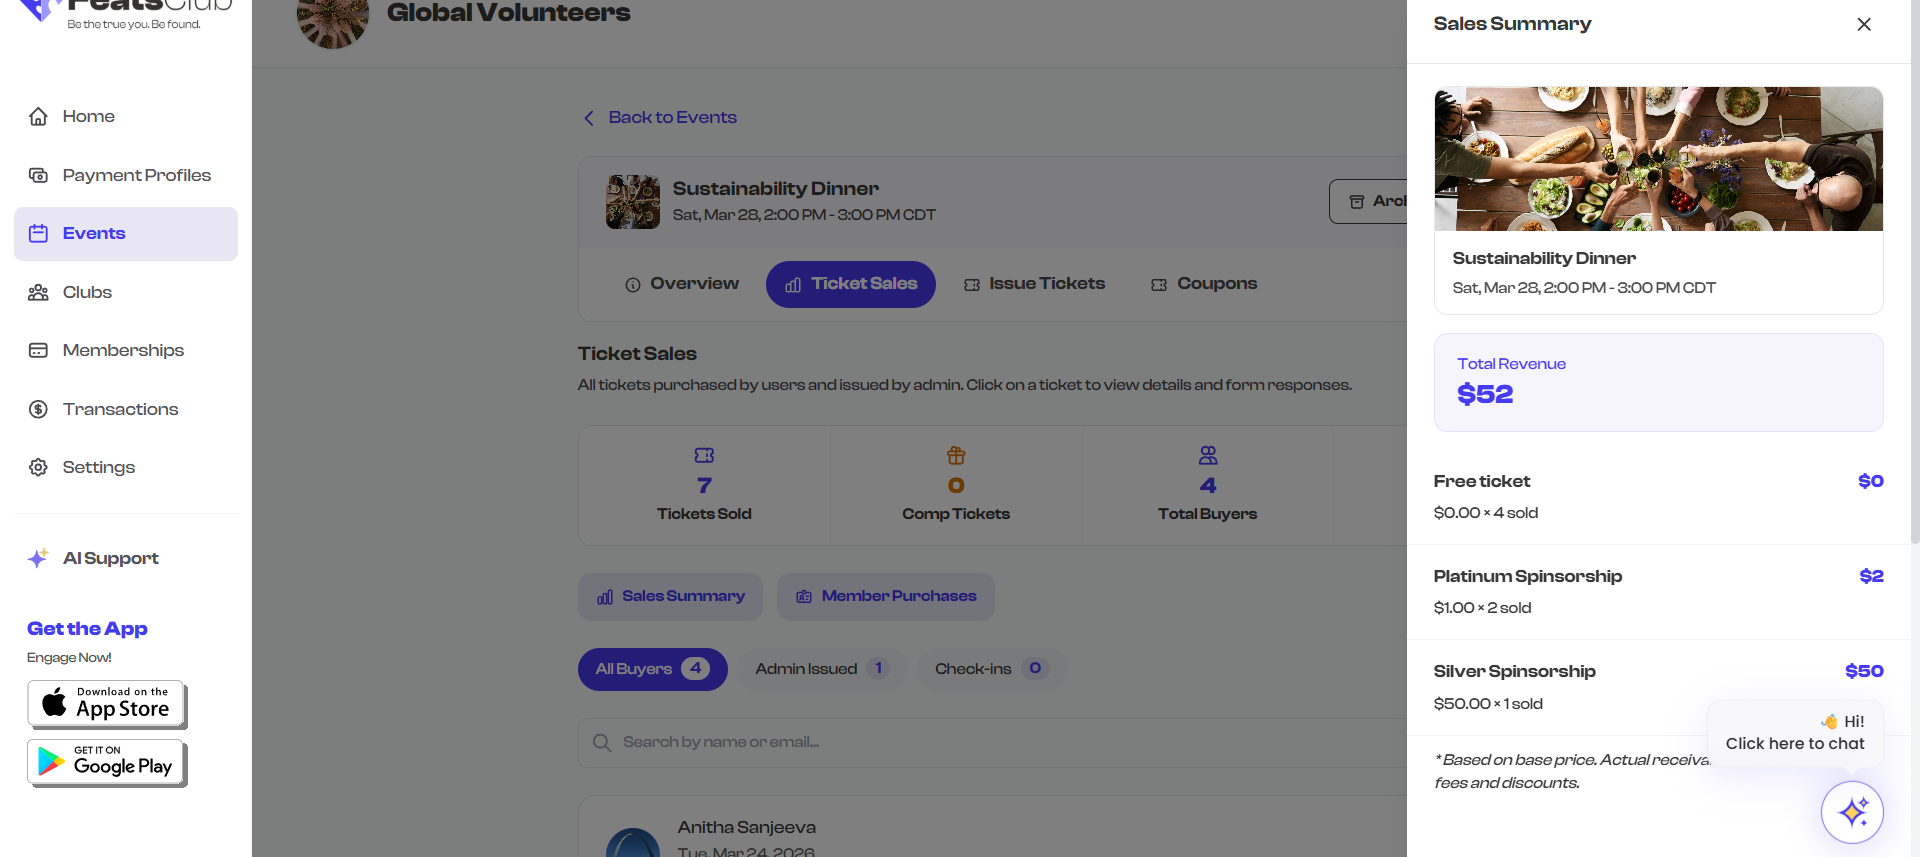
Revenue Tracking
Revenue displayed in the ticket sales view reflects the total amount collected from active ticket sales:
- Active tickets contribute their full purchase amount to the revenue total.
- Canceled tickets are excluded from the revenue calculation.
- Revenue is displayed in the currency configured for the event (USD or INR).
The revenue shown is the gross amount collected from buyers. Processing fees (Stripe or Cashfree) and platform fees are deducted separately. To see net revenue after fees, check your payment profile or Stripe/Cashfree dashboard.
Issuing Additional Tickets
If you need to issue tickets manually -- for example, for walk-in attendees or cash payments -- select the Issue Tickets button on the event detail page. See Offline Tickets for the full guide.
Regularly check the ticket sales view to monitor your event's performance. The real-time statistics help you gauge interest and make decisions about promotion or capacity adjustments.